Wordpress forms integration with amoCRM
- Video review of the plugin for integrating amoCRM with Wordpress forms
- Screenshots of the plugin settings for integrating amoCRM with Wordpress forms and the transferred order in amoCRM
- The cost of an integration subscription for one site
- Main advantages
- Available plugin settings
- Description of the functionality of the plugin for integrating amoCRM with Wordpress forms
- System requirements
- Installing the widget in amoCRM
- Add a website to the integration
- Download and install the Wordpress form integration plugin with amoCRM
- Setting the time zone
- The "Testing" tab in the plugin settings
- Adding a form to the plugin settings
- Form integration settings with amoCRM
- Checking sending data from the form in the plugin settings
- Checking the received data in amoCRM
- Debugging form integration with amoCRM
- Possible problems
- Contact technical support
The plugin allows you to transfer data from arbitrary Wordpress forms to amoCRM.
In simple words, our plugin is able to intercept the data being sent from forms and create settings for them, and redirect it to amoCRM when the data is received again.
Please note that the plugin does not work with forms: Contact Form 7, WPForms, Woocommerce. There are separate widgets for these plugins!
Video review of the plugin for integrating amoCRM with Wordpress forms
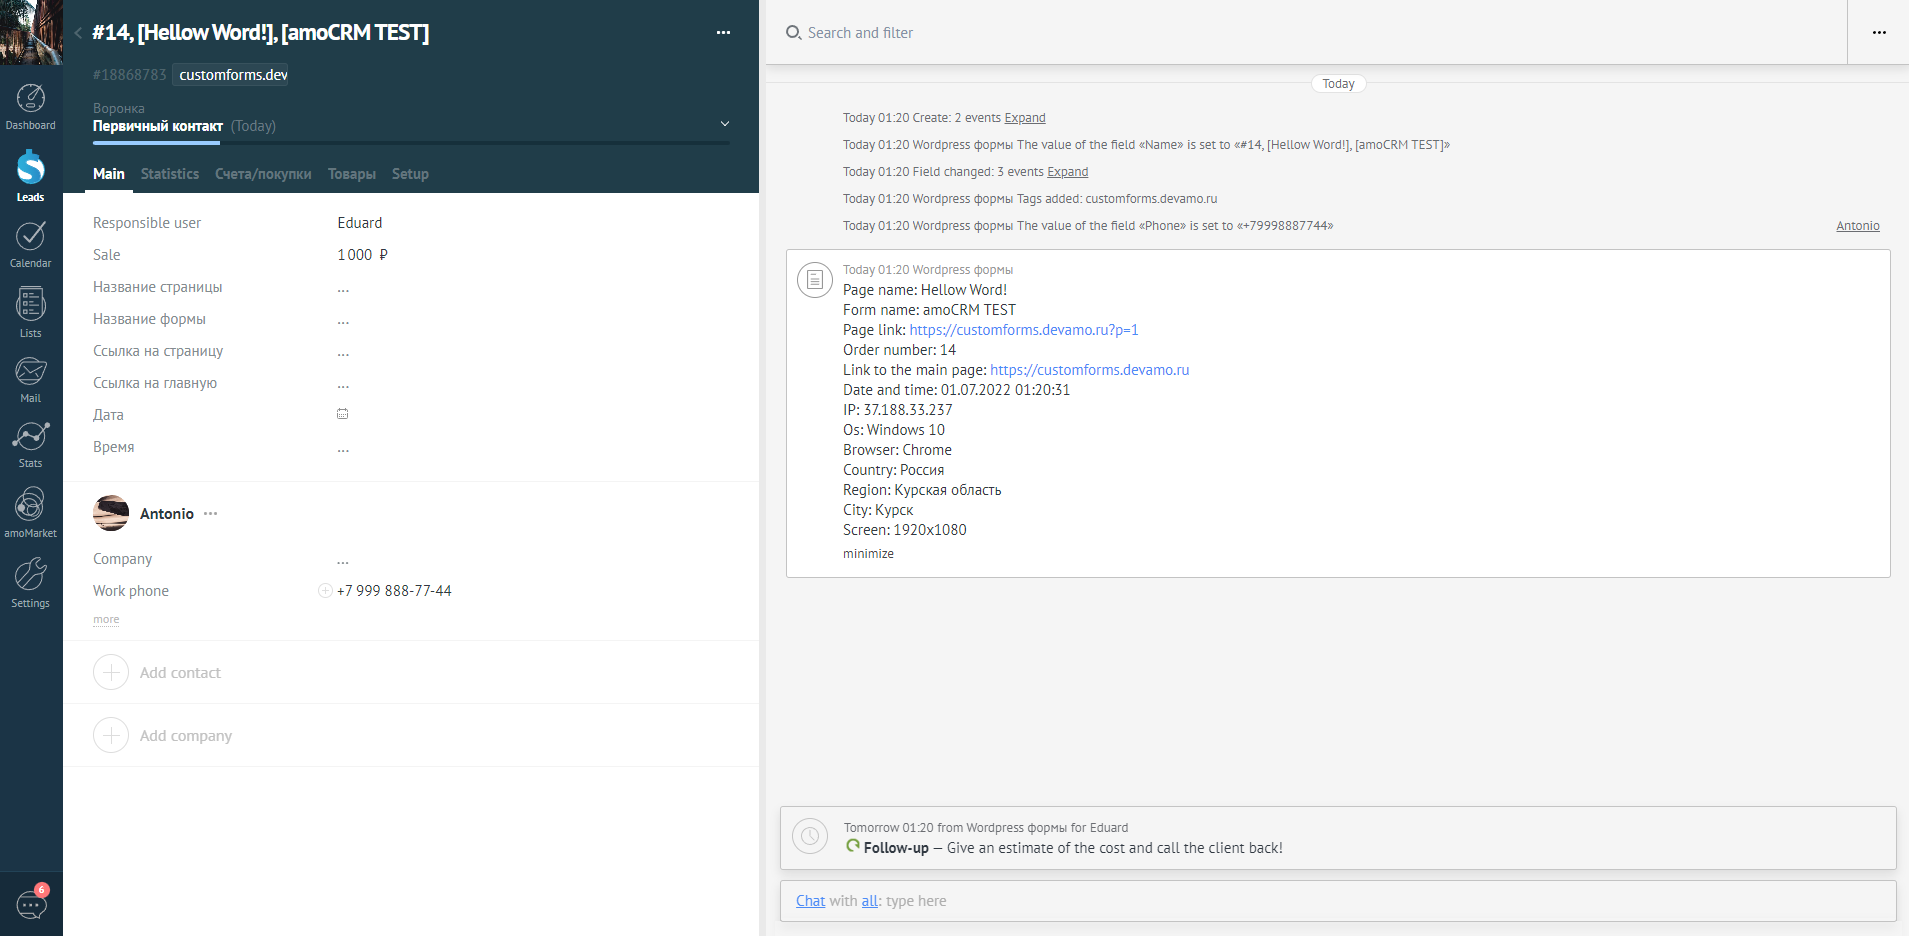
Screenshots of the Wordpress plugin settings of the form for integration with amoCRM and the submitted application to amoCRM
The plugin for integrating amoCRM with Wordpress forms is free, the subscription for integration is paid!
The cost of an integration subscription for one site
- Half a year $60
- One year $100
- Two years $150
Main advantages
- Supports arbitrary shapes.
- Saves applications in wordpress with the ability to view.
- Intercepts analytics data: UTM tags, Roistat, IP, OS, browser, country, region and city.
- The most flexible configuration: any form fields, transaction, contact, tasks, tags, tags, note.
- Quick start in 3 minutes.
- Support for working with Cyrillic domains.
- No programming skills required.
- Testing for 7 days (we can increase it if necessary).
- Free setup help.
- Operational technical support.
Available plugin settings
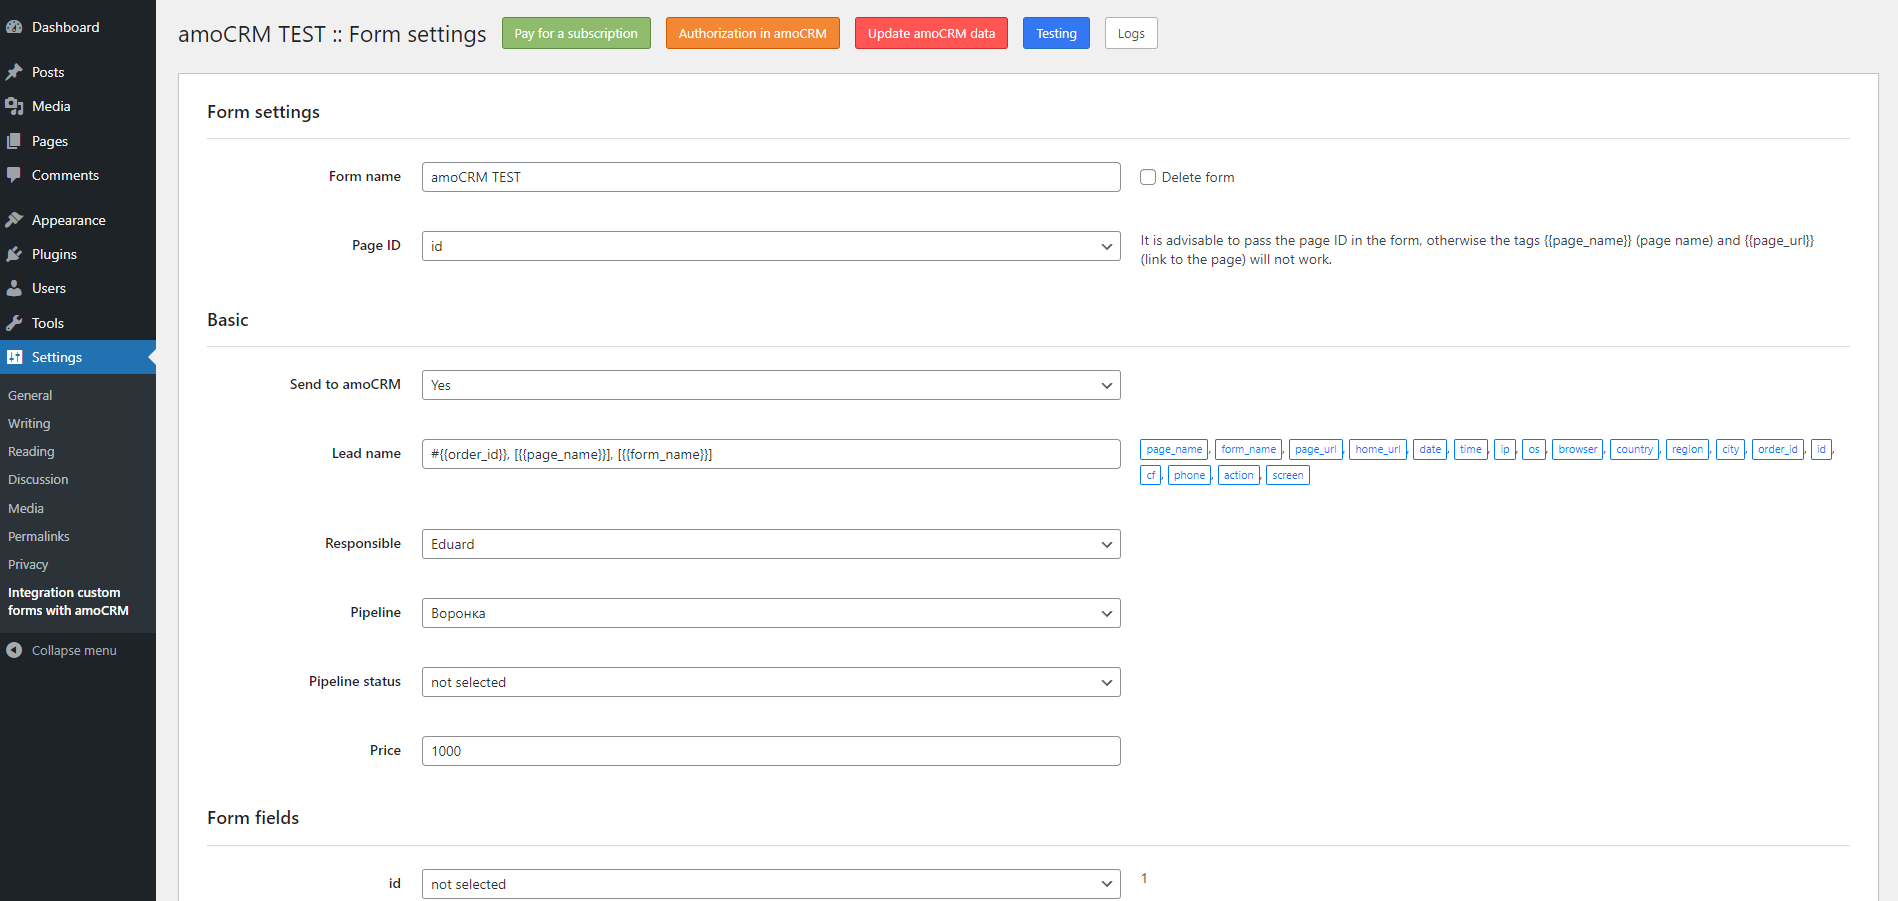
- Customizing an arbitrary transaction name using data from the form and special tags.
- Assign a responsible person for the transaction, contact and task.
- Specify the default responsible for all forms.
- Transfer any data from the form and special tags and analytics data to the transaction or contact fields.
- Create an arbitrary note template using data from the form and special tags.
- Creating tasks with settings: task type, description, deadline.
- Tracking standard UTM tags, Roistat, and creating custom tracked tags.
- Adding arbitrary tags to the transaction using data from the form and special tags.
Description of the functionality of the plugin for integrating amoCRM with Wordpress forms
The main achievement of the plugin for integrating amoCRM with Wordpress forms is the complete management of the form fields and transferring them to the desired fields of the transaction or contact.
We tried to make the plugin setup take as little time as possible and be as clear as possible.
All available data from amoCRM will be automatically loaded into the plugin, you will only have to select them from the list.
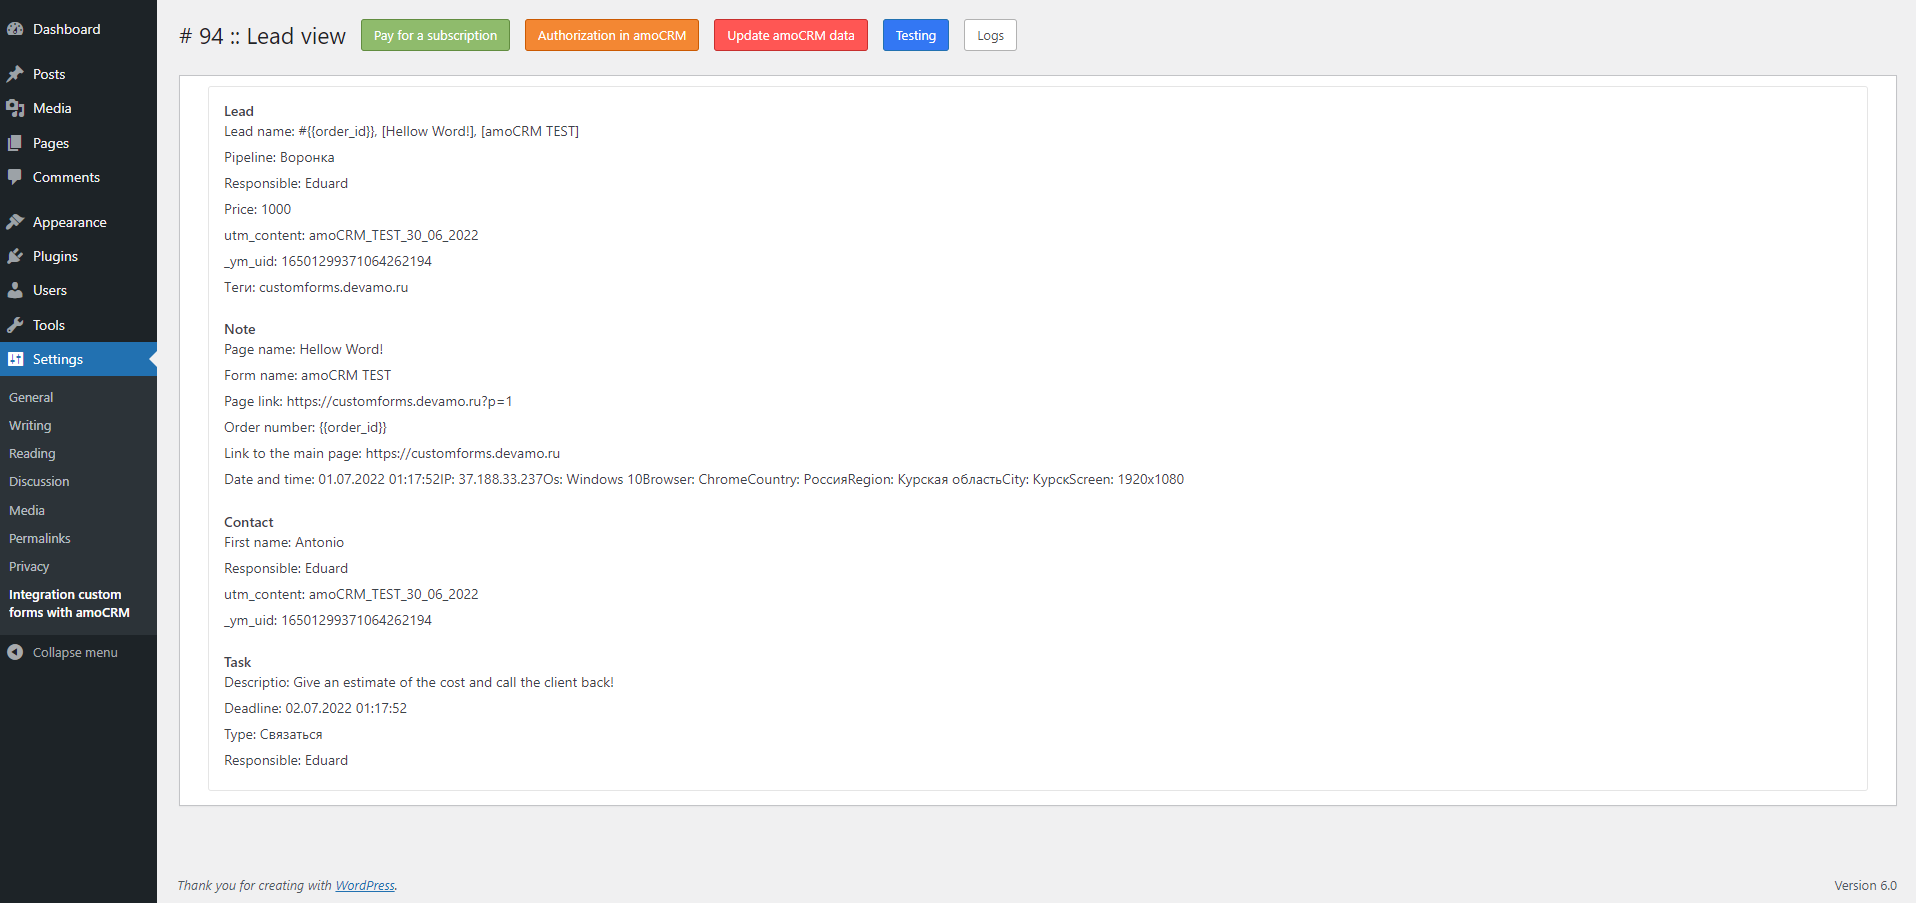
For transactions, we have added the ability to create an arbitrary note template with the ability to use any data from the form and special tags.
We have not bypassed the possibility of creating tasks. The task can be configured individually by selecting the type of task, create an arbitrary description and specify a deadline.
It is possible to track absolutely any tags, you can add as many as you want. Standard UTM tags and Roistat are already created immediately after installing the plugin for integrating amoCRM with Wordpress forms.
The ability to add an unlimited number of tags and labels using form fields and special tags.
The plugin uses our queue server, which guarantees stable operation under heavy load.
System requirements
- Wordpress
- JQuery
- PHP >= 5.6
- curl library
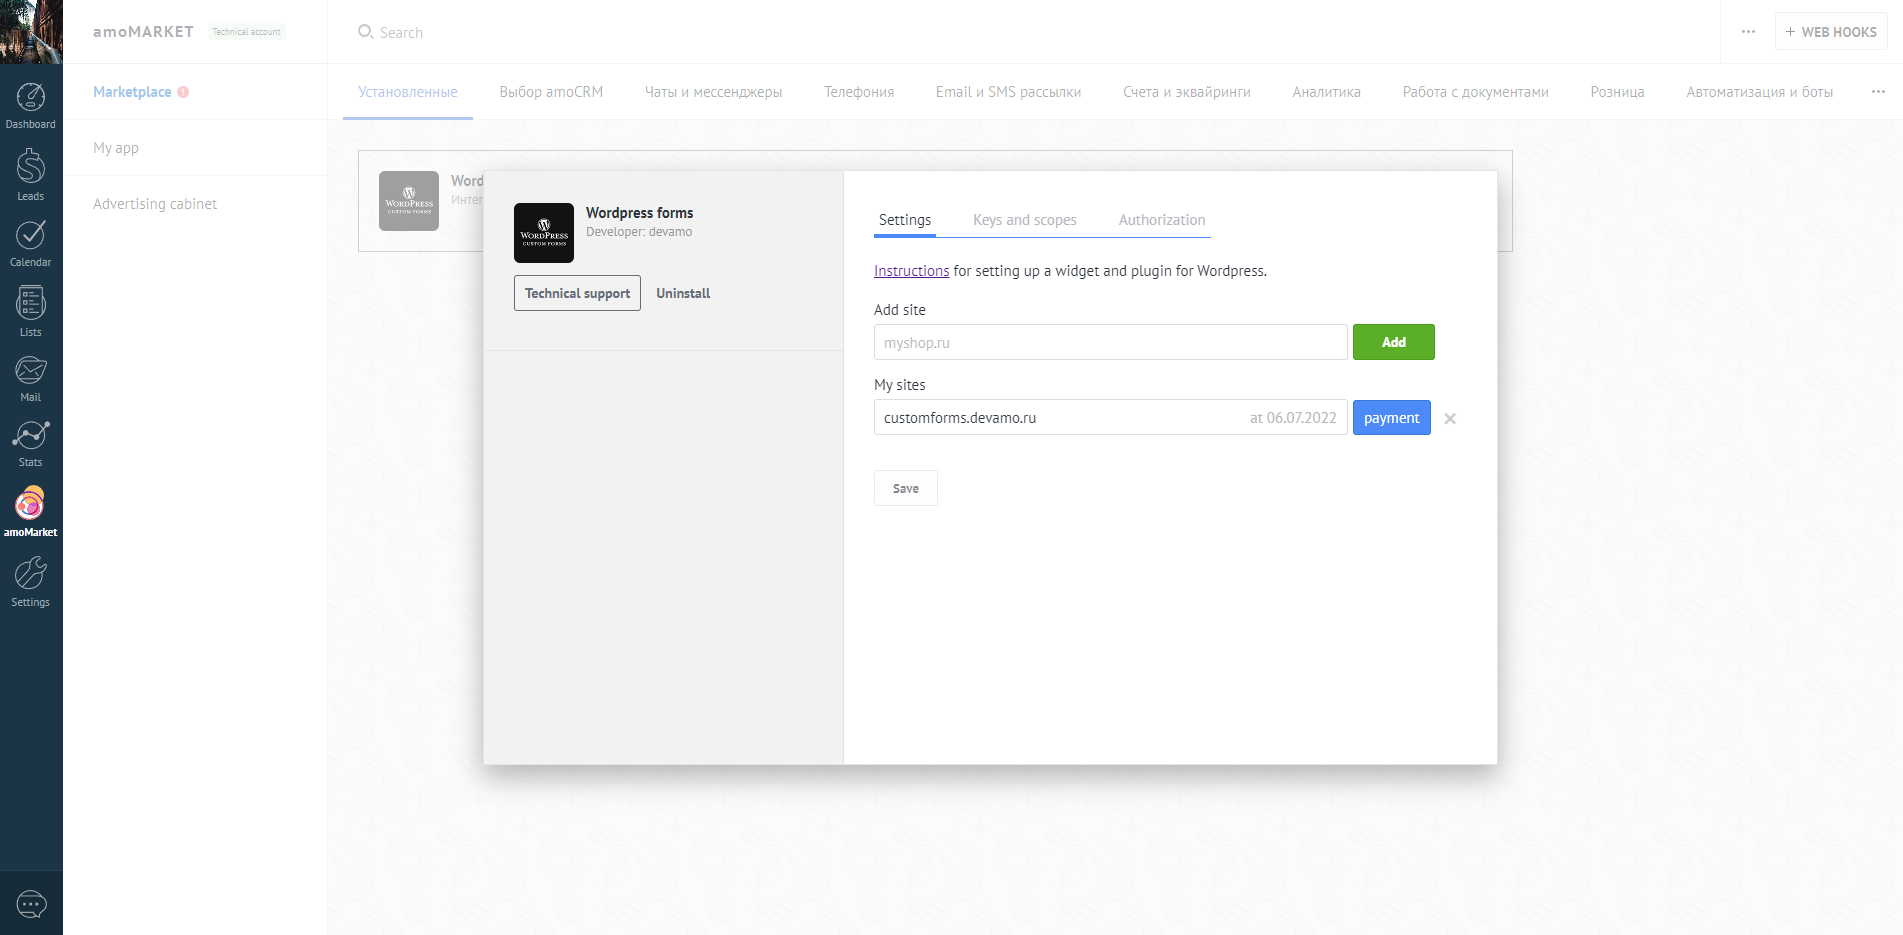
Go to amoCRM personal account> Settings> Integration and go to settings by clicking on the widget icon.

Add your site in the widget settings, then the new site should appear in the "My Sites" list, then click "Save".

Download and unpack archive with plugin, go to site admin panel> Plugins> Add a new, click the "Download Plugin" button, select the previously downloaded archive, click "Install" and after the installation is complete, click "Activate Plugin".

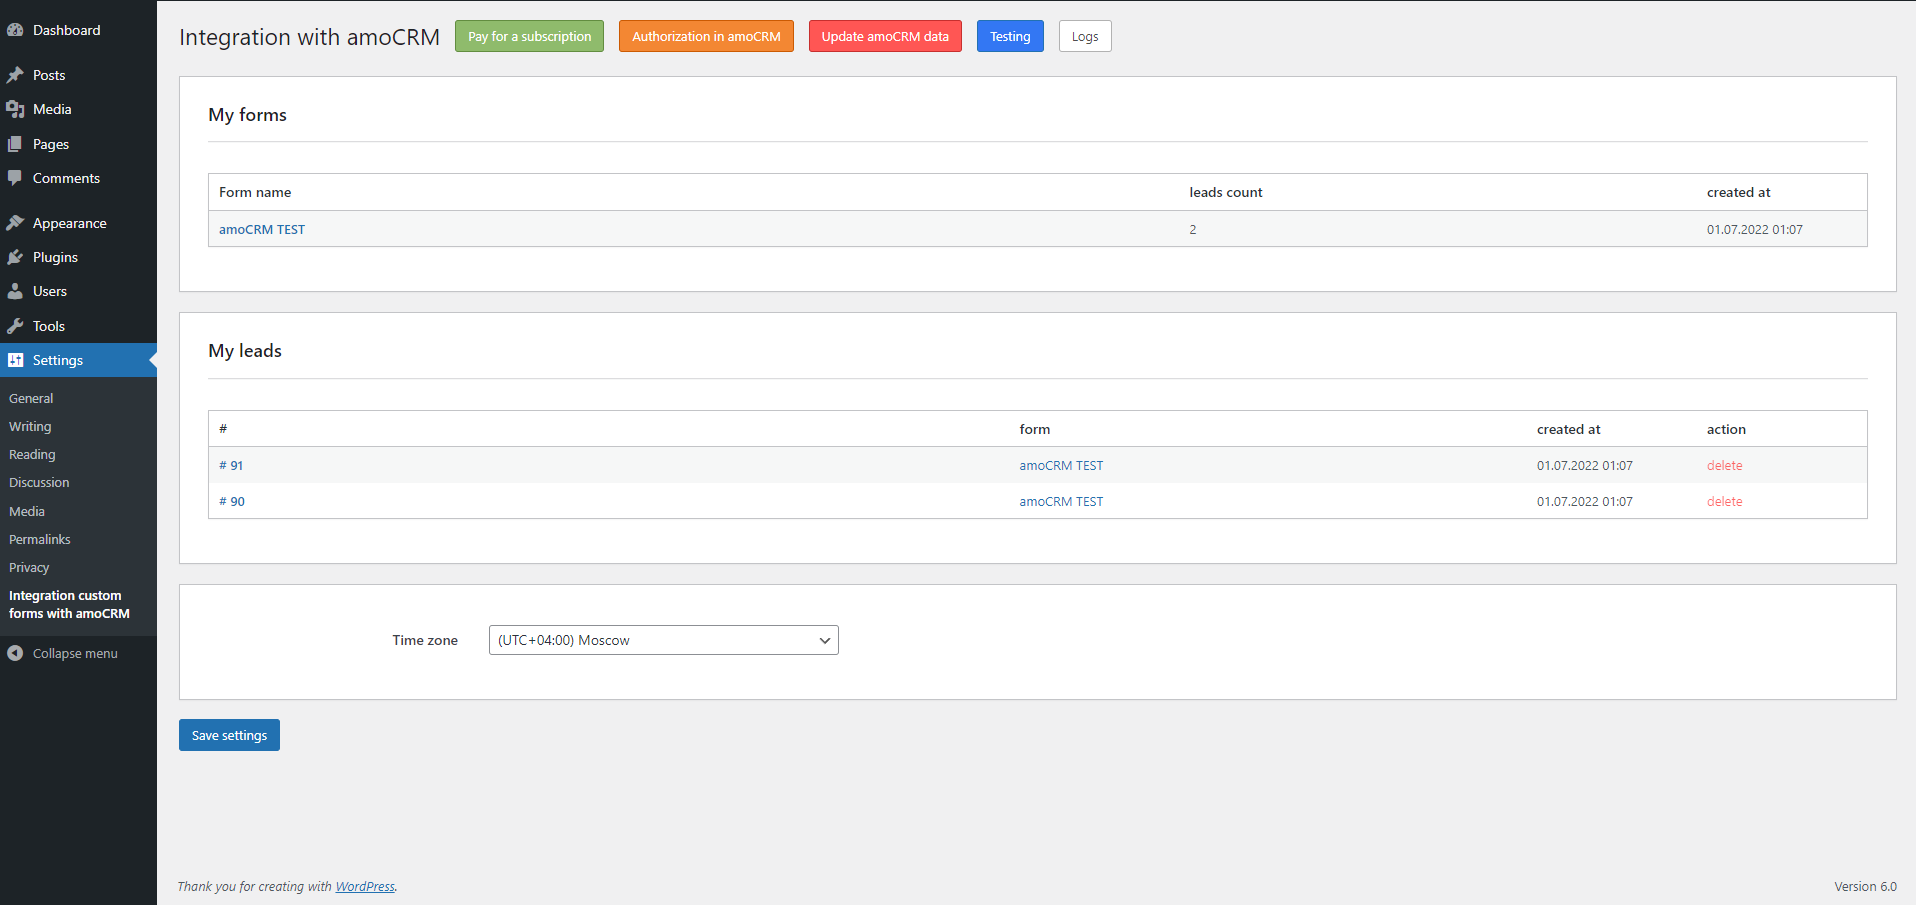
Go to Settings> Integrate forms with amoCRM and specify your time zone, then click "Save Settings".

On the "Testing" tab, check if it should be:
- curl library = installed
- Subscription to integration > today's date
- Authorization = active

Go to the user part of the site to the form page and fill in the fields as your client will do and submit the form.

Go back to admin panel> Settings> Integration of forms with amoCRM. A new form will appear in the "My Forms" block, clicking on the name will take you to the form integration settings. Make the necessary settings by specifying the name of the transaction, selecting the responsible person, funnel, stage, and so on. When the settings are completed, click "Save Settings".

Go to the page where your form is located, fill in the details and submit it. If you go back to the main page of the plugin settings, then in the "My applications" section you will see the submitted application and the forms that you can go to for a detailed view.

Open the Transactions section in amoCRM, check the created transaction, contact, note, task for the correctness of the transmitted data.

If you are a programmer or have at least a little understanding.
To debug the transmitted data in amoCRM, use the Logs tab, in particular, pay attention to the "amoCRM response", if an error is received, then check the "Data for creating a transaction/contact".

Possible problems!!!
1. If the amoCRM fields are not loaded after installing the plugin, then Curl is not enabled on the server. Enable Curl yourself, or contact your site's technical specialist!
2. Check the settings of the "wordpress forms" widget in amoCRM, there may be a typo in the domain or the site has not been added at all.
3. If after the first submission the form is not created in the plugin settings in the "My Forms" block. Possible reasons: jQuery is not connected, the form is not wrapped in the form tag, the "submit" button in the form does not have the type="submit" attribute.
If you have any problems, create a request to technical support or contact us by telegram.